Sweet S¢ents Sachet
After a shoe shopping binge with my daughter a couple of months ago I found myself with a pile of shoe hangers. Being a tree-hugging earth conscious woman I just couldn't bear the thought of throwing them away. There just had to be something clever I could with these (besides hang shoes)!
Right away I noticed how the arches looked like the top of a heart. Hmmm, heart on a hanger? What could I do with that? I know! A heart shaped sachet! And the Sweet S¢ents Sachet was born.
It turned out so well that I am submitting it to Green Craft magazine for publication consideration. Wish me luck!
Materials:
*plastic
shoe hanger
*assorted fabric scraps
*embellishment items (ribbon, lace, crocheted flowers, brads, colored cord, etc.)
*cedar (chips or shavings)
*loose, dried lavender
*8"x8" scrap of tissue, deli, or plain paper
*nail polish or acrylic paint *all-purpose glue (it will need to work on fabric and plastic)
*assorted fabric scraps
*embellishment items (ribbon, lace, crocheted flowers, brads, colored cord, etc.)
*cedar (chips or shavings)
*loose, dried lavender
*8"x8" scrap of tissue, deli, or plain paper
*nail polish or acrylic paint *all-purpose glue (it will need to work on fabric and plastic)
*embroidery floss (optional)
Tools:
*pencil
*scissors
*ruler
*straight pins
*sewing machine
*sewing needle and thread
*clothes pins
*pencil
*scissors
*ruler
*straight pins
*sewing machine
*sewing needle and thread
*clothes pins
Instructions:
1. Fold scrap paper in half to create a center line then open and lay it flat on your work surface.
1. Fold scrap paper in half to create a center line then open and lay it flat on your work surface.
2. Lay the shoe hanger on the paper centering it on the folded line with the
shoe arches close to the top. Decide where you want the top indent to begin,
place your pencil point to the right side of the hanger and draw a line up and
around the curve of the hanger continuing down to the fold line to create the
bottom point.
Move
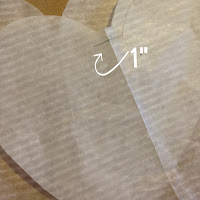
the hanger aside and draw a straight line from the starting point at the top
indent over to the fold line (Note: when the paper is open this straight line
should be at least 1" or large enough to fit the top of the hanger through,
make adjustments now if needed). Make any adjustments to the heart shape that
you would like.
3.
To create a seam allowance measure 1/4" out from your drawn line and make
a dot, repeat this all the way around the heart half.
5.
Gather various scraps of fabric, ribbons and lace and piece together on your
sewing machine or by hand sewing until you have created a piece large enough to
fit two heart patterns. Add machine or hand embroidery for extra pizzazz.
6.
Pin your heart pattern to the fabric and cut two heart shapes. (Note: If you
have used lace or thin materials that need to be lined like I did, cut two more
hearts from some thin cotton material. Baste a lining heart to the backside of
each fabric heart close to the edge using a zig zag stitch.)
7.
Place right side of the fabric together and pin. Measure a 2-2 1/2" space
on the right side of the heart. This space will be left open for the hanger
arches to squeeze through (Note: mine were very flexible and could be pushed
together easily). Measure a 1" space at the top indent to be left open. This space is for the top of the hanger to
fit through. Mark these two areas with a faint x in the seam allowance so that
you remember not to sew them.
8.
Begin sewing at the top indent marking on the right, backstitch to secure, and
continue around to the first side opening mark, backstitch to secure and cut
thread. Begin sewing again at the second side opening mark, backstitch to
secure, continue down to the point, pivot and continue up and around the other
side stopping at the top indent marking on the left, backstitch to secure. You
should have a sewn heart with an opening at the top indent and an opening on
the right side.
9.
Clip the seam allowance to just above the seam around the curves. At the top
indent clip diagonally from the edge of the fabric to just above the end of the
seam. Trim the seam allowance close to the seam at the point to make it easier
to turn right side out.
10.
Turn heart right side out through the side opening.
12.
Gently feed the shoe hanger into the heart through the side opening, guide the
top part of the hanger up through the top indent opening while squeezing the
shoe arches into the side opening. Once the hanger is all the way in, pull the
top of the hanger so that the shoe arches fit into the curves of the heart.
13.
Tuck the top indent opening seam allowance inside so it looks smooth and neat.
Place glue around the inside of the top indent opening and hold secure with clothes pins until dry. Drying time will
depend on the type of glue you use.
14.
Embellish the hanger with nail polish or paint, ribbon, cording, flowers, etc.
Allow to dry completely.
15.
Fill the heart with a combination of cedar and lavender.
16.
Hand sew the opening closed using coordinating thread.
17.
This Sweet S¢ents Sachet works perfectly with Closet-Maid systems. Don't have a Closet-Maid system? No problem! Tie to a closet rod with ribbon or simply
hang it on a push pin. Makes a great house warming gift too!
*As a side note..this is my first tutorial so please forgive the lack of detailed pics and any
discrepancies you find. If you have any questions about the process please shoot me an email and I will be happy to explain further.


